The following are installation instructions for setting up a Active \ Passive SQL Server on a two Node Cluster.

Check the Database Engine Service and select Next.
 |
| Add caption |
Enter the SQL Instance name in the three
boxes.
Do not change the Install root directory.
Leave this alone. Press next.

Enter your SQL Server Resource group name
in the Drop down box.

If required Untick DHCP
Enter the IP address of the SQL Instance.
Press Next.

Select your designated AD Group that the
SQL Server will use for domain group.

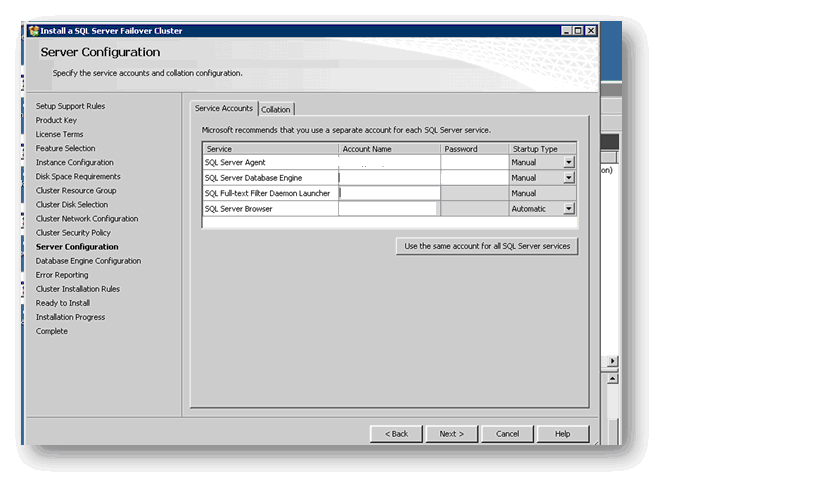
Use the Service account associated to the
SQL Instance.
Select your designated AD account for the
SQL Server Agent and Database Engine and enter the password. (Also make sure to
check the system collation is the correct one you want).
Select
the Authentication Mode type.
If needed, add your own account as SQL
Server Administrators by selecting Add Current User.

Check the Data Directories are pointing to
the correct disk drives.

Continue to Select Next until its starts
the actual Installation.
This completes the installation of SQL
Server on the first (preferred) Node.
Step
2
Add Second Node to Cluster
Log onto the Second Node and run the SQL installation program.
Select Add node to a SQL Server Failover
cluster.

Select your designated SQL Instance from
the drop down box.

Enter the Password for the Database Engine
and Server Agent account for its designated service account.

Select Next and continue until the Install
button and press Install.
This completes the setup of SQL Server 2008
R2 Instance installation on a Cluster 2008 R2.
No comments:
Post a Comment